
How to Create a Free Temporary Email Address
Create and copy a free temporary email address in Temporarly. Follow real desktop and mobile screenshots, check expiry, and find your incoming messages.
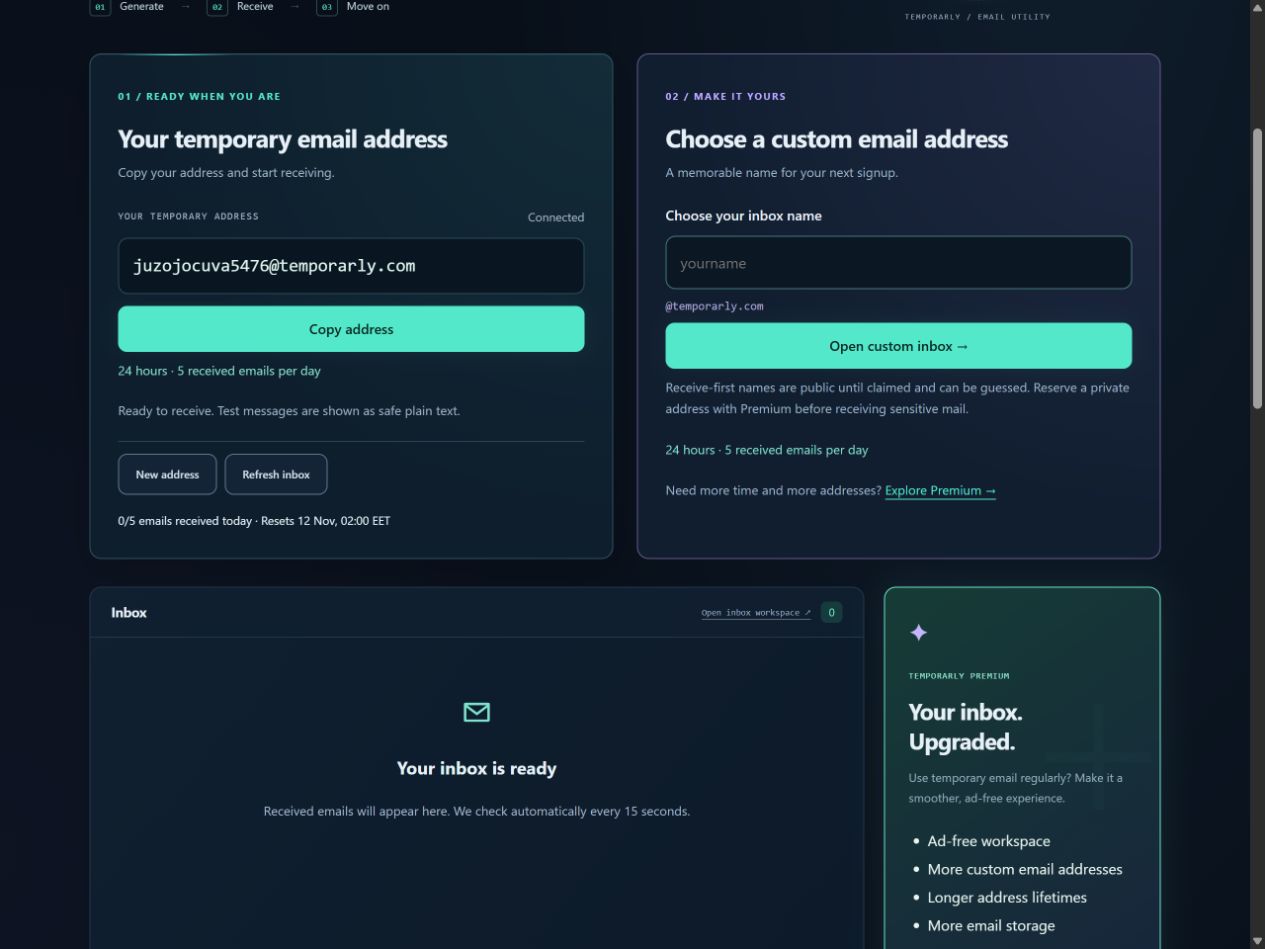
Quick answer: Open Temporarly, copy the generated address, and use it in a permitted, short-lived signup or your own email test. Keep the inbox open to read incoming messages. On a phone, choose Generated address above the address card.
This guide shows the live guest experience on desktop and at a 390-pixel mobile width, captured on 12 November 2026. The example address is for the demonstration: use the fresh address shown in your own browser.
When a disposable email address is useful
A temporary mailbox separates a one-off interaction from your everyday inbox. It is useful for a disposable test account in an app you own, a permitted short-lived registration, or checking how a welcome email renders. It is not a replacement for the mailbox attached to purchases, travel bookings, important accounts or password recovery.
Some websites block temporary email domains. A readable address does not guarantee acceptance or change a sender's spam filtering. Follow the website's signup rules.
1. Open the free temporary email tool
Visit the Temporarly homepage. The generated address connects automatically. Wait until its status says Connected and the Copy address button is available.
On desktop
The generated and custom options appear next to each other. Use the left-hand generated address when you do not need to choose a name.
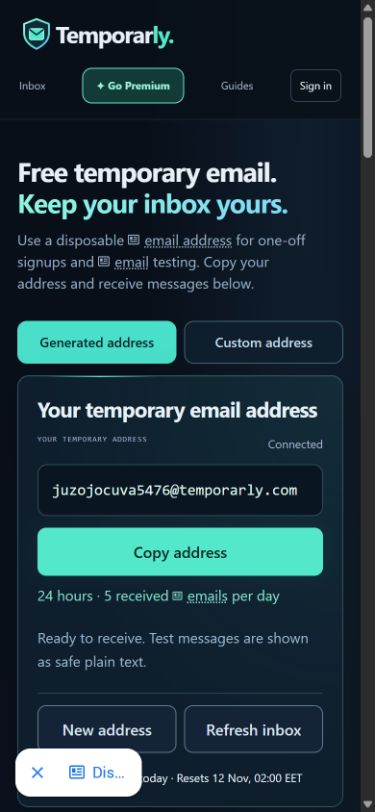
On mobile
Select Generated address. The same address and copy control fit in one column; there is no need to scroll through the custom form to find them.
2. Copy the complete email address
Tap Copy address. Look for the Address copied confirmation, then paste it into your own test form or another service that permits temporary email. Include both the name and @temporarly.com; a partial name is not a complete email address.
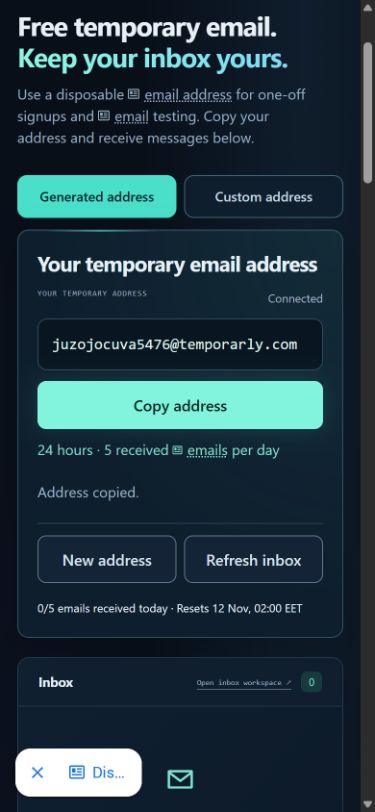
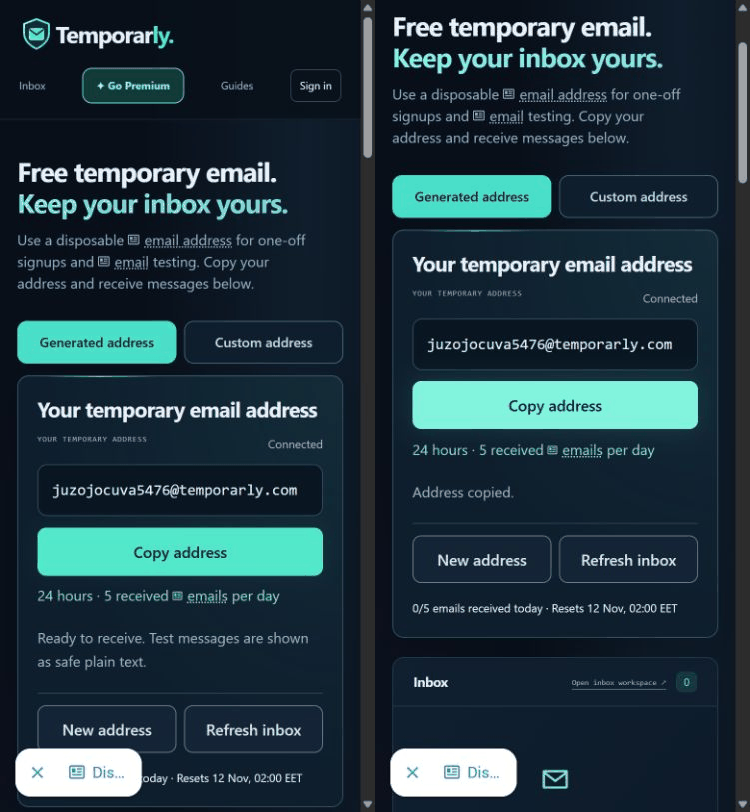
Watch the short step-by-step demonstration. This animation uses real captured interface states. It opens only when selected; the screenshots show the same steps without motion.
3. Read incoming mail in the inbox below
Return to Temporarly after the other service sends its email. The inbox checks automatically; Refresh inbox also requests an update. The empty inbox in these screenshots is a real empty demonstration, not proof of a delivered message.
If an email does not appear, check the exact recipient, the address lifetime and whether the sender accepts disposable email. Allow for delivery delays before repeatedly requesting a new code. A message cannot appear unless the sending system actually sends it to the right address.
4. Keep the same address for the same task
New address creates another address. Refreshing the page keeps the current guest address in the same session. Do not generate a replacement halfway through a verification flow, or you may be watching the wrong inbox.
Check the limits before you start
The guest generated inbox currently lasts 24 hours and allows five received emails per day. The interface shows the allowance and reset time. An expired address stops receiving and is not reassigned. Clearing browser data or changing browser sessions can also affect access, so do not depend on this mailbox for long-term recovery.
Do I need Premium?
For a single short test, start free. For longer address lifetimes, more addresses and an ad-free workspace, compare Free, Plus and Pro. Paid temporary addresses still expire.
Can I choose my own name?
Yes. Follow the custom temporary inbox guide. Choose a fresh name before sending when you want to claim access first.